Quick Start: Generate AI Insight Reports in 15 Minutes


Welcome to UX Agent! You're just a few steps away from unlocking deep, automated insights into your user experience. This guide will show you how to get set up and generate your first report.
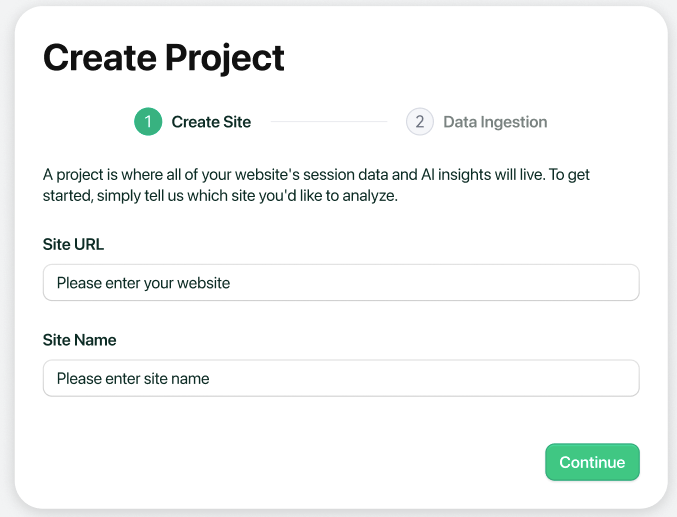
Step 1: Create Your Project
A project is where all of your website's session data and AI insights will live. To get started, simply tell us which site you'd like to analyze.
Step 2: Data Integration
To ensure you can get started as quickly as possible, we offer two simple and powerful ways to connect your data. Whether you're new to session recording or already have an analytics setup you love, you can be up and running in minutes.
Let's find the right path for you.
This method is perfect if you're looking for the fastest, simplest setup, or if you're not already using a session recording tool. It’s an all-in-one solution.
Simply copy the provided tracking code and paste it into the <head> element of your website's HTML(Find the code in the dashboard’s Project Settings.).
Alternatively, if you use Google Tag Manager, you can easily install the code by creating a new "Custom HTML tag" and pasting the snippet there.
Why choose this method?
- All-in-One: This single snippet contains everything needed to start capturing user session recordings and sending them securely to our AI for analysis.
- Zero Configuration: There’s no need to configure anything else. Just copy, paste, and you're ready to go.
- Fastest Time-to-Value: You can start gathering data for your first AI insight report within minutes of adding the code.
If your team already uses PostHog and has session recording enabled, this is the ideal path for you. You can leverage the data you're already collecting without adding a single new line of code to your site.
Connecting your existing PostHog account is a simple, three-step process:
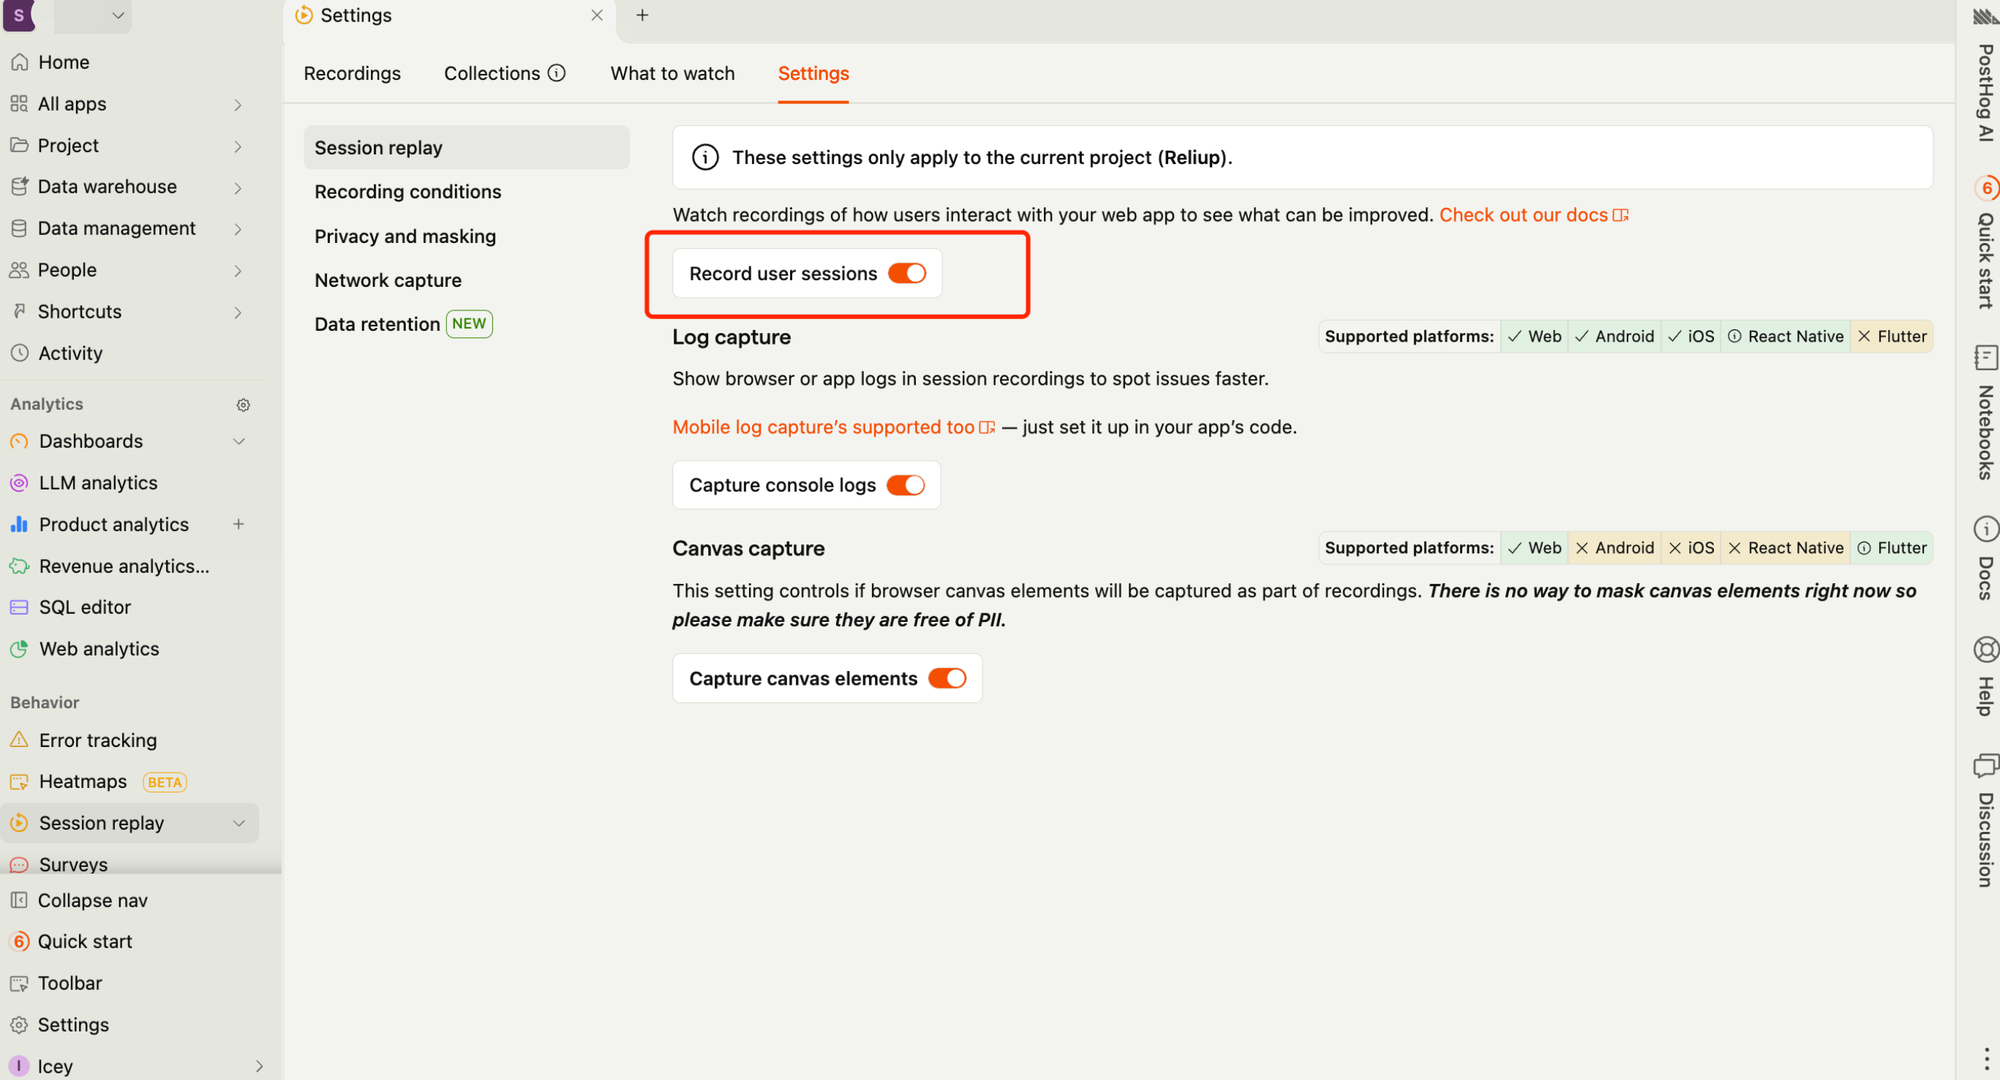
- Step 1: Enable Session Recording in PostHog
- Navigate to Session Replay -> Settings in your PostHog dashboard and make sure the "Record user sessions" toggle is enabled.
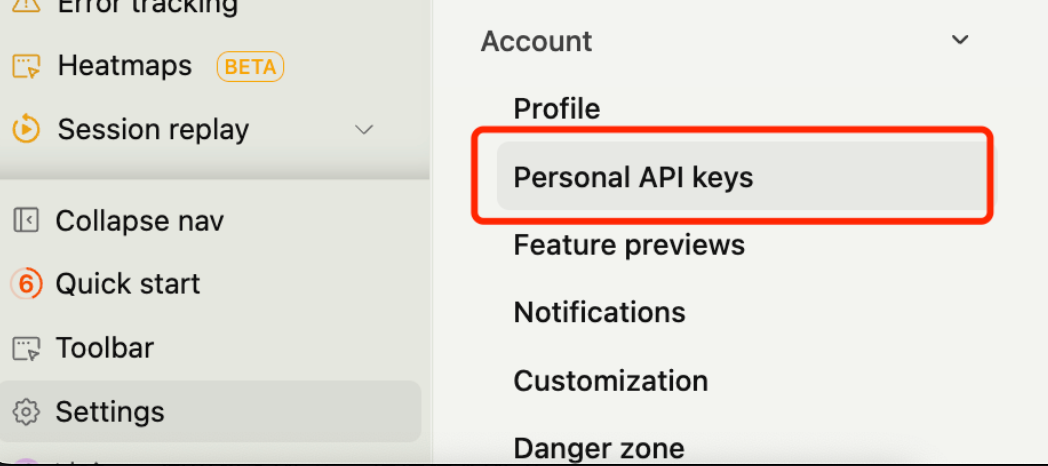
- Step 2: Create a PostHog Personal API Key
- Go to Settings -> Personal API keys. Click to create a new key and, most importantly, grant it Read access for Session recording. Copy the generated key.
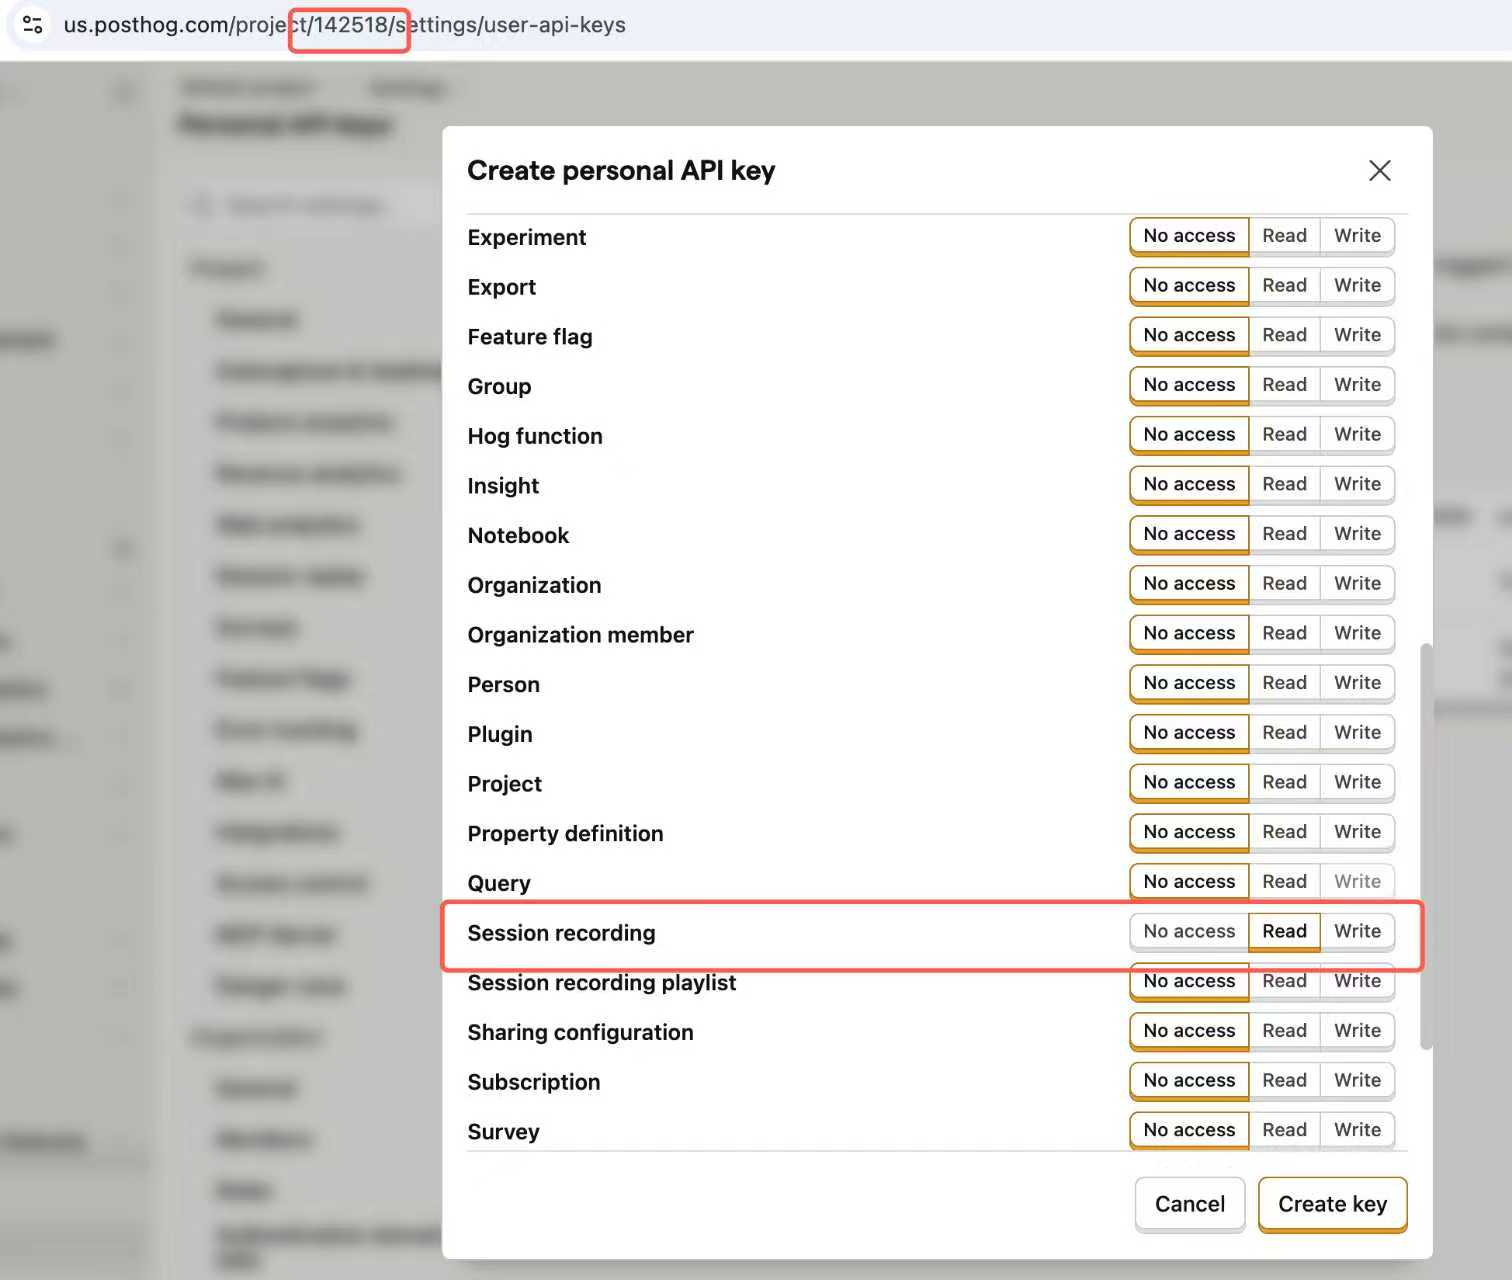
- Step 3: Find Your PostHog Project ID
- Your Project ID can be found directly in the URL of your PostHog dashboard.

Once you have the API Key and Project ID, simply enter them into the fields in UX Agent and click "Save."
Why choose this method?
- No New Code: There is absolutely no need to involve your engineering team or modify your website's code.
- Single Source of Truth: Our analysis is based on the same data your team already knows and trusts.
Step 3: Create Your First Insight
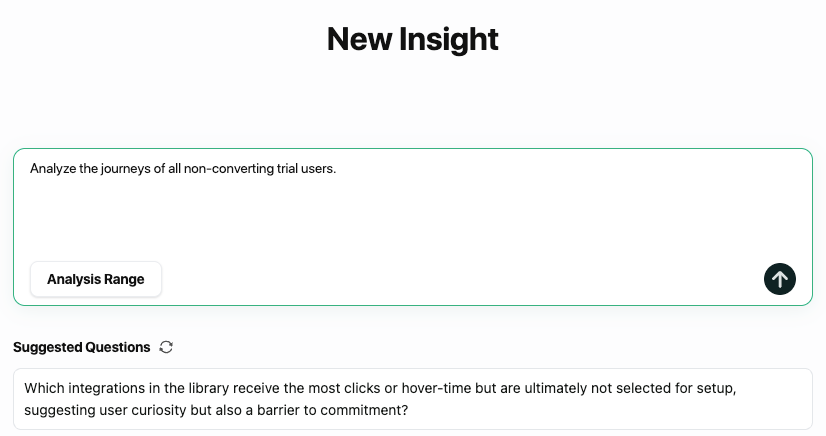
Session data will start appearing automatically after you install the tracking code and receive your first user visit. On the left-hand side, you'll see the Insight Panel. This is where you can ask any UX question you're interested in.
Click to create a new insight. Let's start with something broad but powerful. Type in: "Analyze the journeys of all non-converting trial users." The AI will now sift through all the relevant sessions to identify patterns, friction points, and key drop-off reasons. This may take a few minutes depending on the volume of data.
Once completed, a professional report will be generated in the main panel. You can see a summary of findings, a breakdown of issues, and, most importantly, click on any finding to instantly watch example recordings for full context.
That's it! You've just replaced countless hours of manual work with a simple question and received a deep, actionable report in minutes. Welcome to the future of UX optimization.